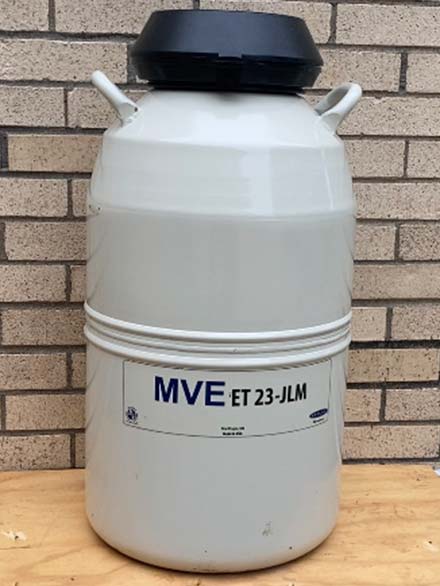
A liquid nitrogen tank is a cryogenic storage container that can be used for preserving and storing semen for an extended period of time. Semen is a significant cost in an artificial insemination program, and maintaining a liquid nitrogen tank’s integrity is key to protecting that investment. A liquid nitrogen tank is not inexpensive but can last for many years with proper care and maintenance.
Understanding liquid nitrogen
Under normal atmospheric conditions, the nitrogen we encounter is in the gaseous phase rather than the liquid phase. In fact, the air we breathe is approximately 78% nitrogen gas. Nitrogen is primarily observed in the gaseous phase because it boils at the extremely low temperature of -320 degrees F. Atmospheric nitrogen gas can liquefied using a series of commercial steps, producing liquid nitrogen that can be used for cryopreservation. However, liquid nitrogen rapidly boils off into the gaseous phase when exposed to normal atmospheric conditions.
Structure of a liquid nitrogen tank
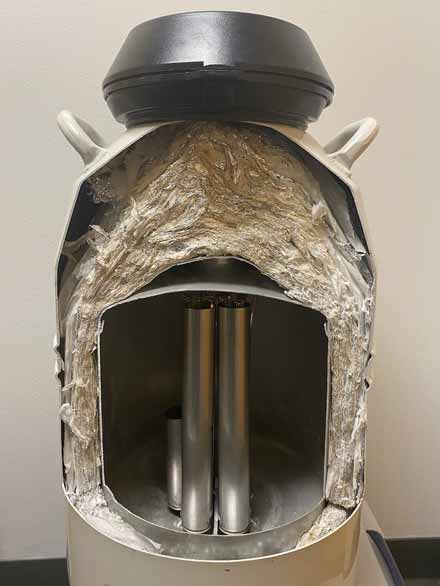
A liquid nitrogen tank is a double-walled container in which two tanks are fused together with a fiberglass neck (Figure 1). During the manufacturing process, a vacuum is drawn in the space between these two containers. The vacuum aids in the insulation of the inner tank and ensures that nitrogen evaporates much more slowly than it would if simply exposed to air. As long as there is actively evaporating liquid nitrogen still in the tank, the nitrogen vapors inside the tank are as cold as the -320 degrees F liquid nitrogen, keeping semen stored in the tank at an appropriate cryogenic temperature.
The inner tank is suspended from the outer shell by the neck structure; therefore, cautionary measures should always be taken when handling the tank. The plug in the neck of the tank is fitted so that evaporating nitrogen gas is allowed to escape in order to prevent pressure build up. This plug should be kept in place when the tank is not in use. The outer shell of the tank is made out of aluminum and should be handled with care so as not to cause denting or damage. Damage that may appear minor could result in the tank losing its insulative ability to maintain liquid nitrogen.
Storage and care
A liquid nitrogen tank should be stored in a clean, dry, well-ventilated environment. Avoid placing a liquid nitrogen tank on concrete, as abrasion and corrosion can occur on the bottom surface of the tank. For increased longevity, liquid nitrogen tanks can be stored on top of a wooden or composite platform to prevent accumulation of moisture under the container (Figure 2). Store the tank away from heavy traffic and only move when needed. It is important to keep the outside of a liquid nitrogen tank clean and free of chemicals and manure. Manure can be corrosive to the outer shell of liquid nitrogen tank if left on. Chemicals can also be corrosive to the shell, therefore, use mild soap and water to properly clean the tank. Avoid getting any water down into the neck, either when cleaning or during use. It is also critical to avoid wetting the plug. If a plug does get wet, allow it to dry thoroughly. Water in the neck or plug will freeze when the plug is placed in the neck, potentially causing damage as the neck and plug are frozen together.
Transporting and handling
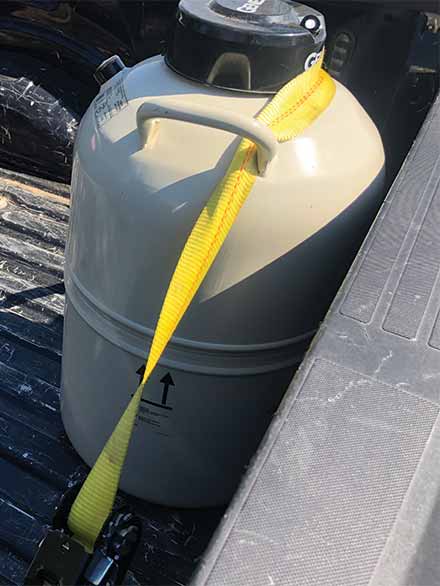
If transporting by vehicle, make sure the tank is securely fastened and upright (Figure 3). Any tipping or damage to the tank from being moved can cause premature loss of liquid nitrogen. Bear in mind that nitrogen vents out of the tank constantly, and it is not safe to be in an unventilated space with a liquid nitrogen tank. This can include inside a vehicle, especially if there is no new air flow circulating through the vehicle through the windows or air conditioning system. It is suggested to not transport liquid nitrogen tanks inside of the passenger compartment of a vehicle. Instead, secure the tank using tie-down straps in the bed of a pickup truck, ideally protected from weather via a camper shell or similar bed covering. If a tank simply must be transported inside the passenger compartment of a vehicle, ensure constant flow of fresh air into the vehicle.
When working, place the liquid nitrogen tank in a safe, secure location. If the tank were to be hit by force, such as by an animal or a chute, damage could occur to the internal neck structure. This would result in the tank’s vacuum no longer being effective for insulation. When moving, lift the tank with both handles to keep it level and avoid rough handling.
Monitoring nitrogen levels
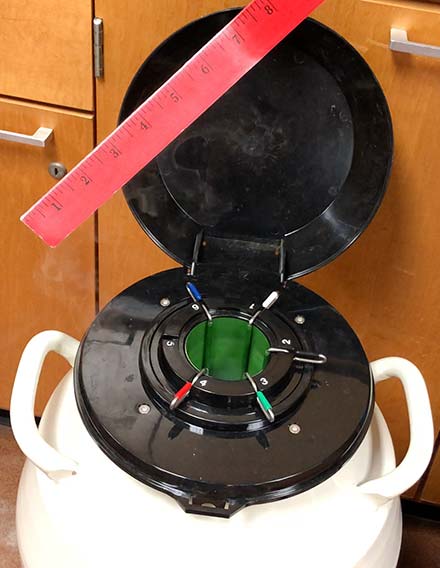
The rate of nitrogen evaporation will depend on how frequently the tank is opened, the type of tank, and the integrity of the tank. To measure nitrogen levels, lower a wooden or plastic measuring stick down to the bottom of the tank and allow it to cool. Withdraw the stick and read where the level of frost reaches to, indicating the nitrogen level (Figure 4). It is often possible to develop a tank refill schedule with an AI representative from a company or cooperative, but remember to routinely monitor the tank independently as well. Keep a log of the level of liquid nitrogen present each time the tank is checked. If the liquid nitrogen level in the tank is decreasing faster than usual, there may be a leak.
Tank damage
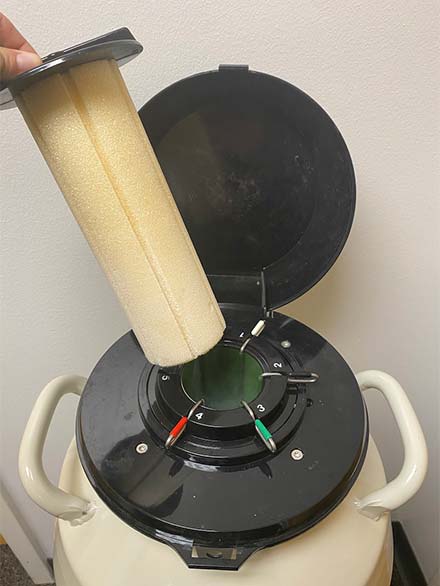
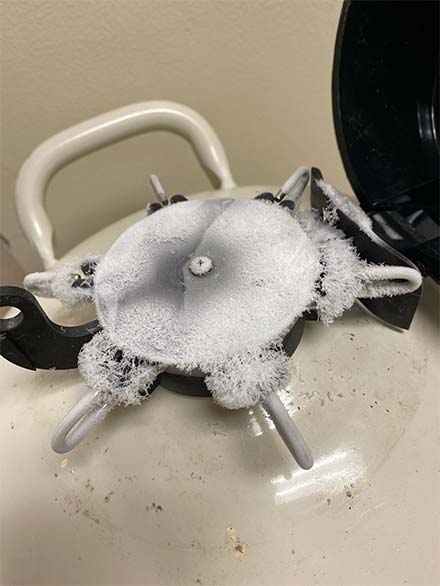
Use care when handling the plug, making sure that it remains in good working condition and is dry when inserted (Figure 5). Over time or from rough handling, the lid and plug may no longer be effective. If this is the case, seek replacement parts and repair. A faulty lid or plug could result in substantial liquid nitrogen loss.
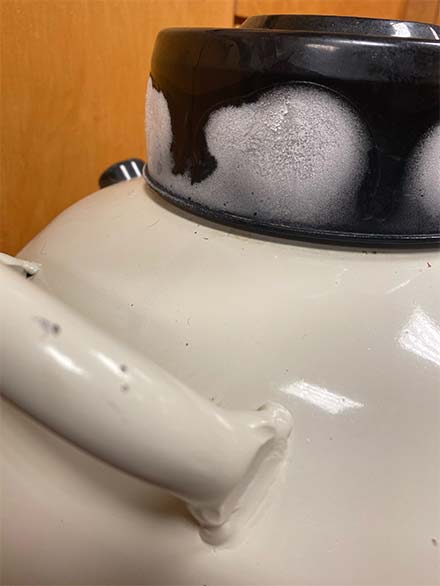
Although liquid nitrogen tanks have the potential to last for years with proper care, they will eventually fail due to loss of the interval vacuum that gives it its insulative ability. The tank should be observed regularly to detect excessive nitrogen evaporation and signs of damage (Figures 6 and 7).
Ice spots on the outer shell are an indicator that a dent on the shell has compacted the insulation material, resulting in heat being transferred in. The tank’s liquid nitrogen holding time will be decreased either slightly or substantially, depending on the severity of the damage.
Ice around the cap and on the top of the shell indicate there may be a slow vacuum leak. This is more frequent in older tanks. A repair or replacement will be needed in order to prevent damage of the tank’s contents.
Complete frosting of the outer shell is an indicator of loss of the tank’s vacuum. In this case, it is important to act immediately. Complete loss of the vacuum means there will be less than a few hours to transfer the contents of the tank into another container before the tank’s liquid nitrogen is depleted.
