Tips for Successful Water Bath Canning
 Water bath canning (also known as boiling water bath canning) is a method of food preservation where filled canning jars are submerged in boiling water for a specific time. While in the boiling water, two important things happen: 1) the food product is heated to sufficiently kill any potential bacteria; and, 2) oxygen is removed from the jar, which allows a vacuum seal to form between the lid and rim when the jar cools. Both factors are necessary to avoid spoilage and ensure a safe and quality product. Water bath canning can only be used to preserve high-acid or acidified foods (pH of 4.6 or lower) such as fruits, pickles, relishes, salsas, acidified tomatoes, fruit jellies, jams, butters, marmalades, and preserves. A water bath canner may be any piece of cooking equipment that will sufficiently hold the jars and allow boiling water to cover the jars with 1-2 inches of water.
Prepare the Canner. Fill the canner 1/3 to ½ full with water. Heat the water to 180⁰F for hot pack or 140⁰F for raw pack.
Sterilize Jars or Not. If the processing time is less than 10 minutes, sterilize the jars. Otherwise, wash the jars and keep them hot using a dishwasher or place them in the heated canner water (fill jars with some water to keep them in place).
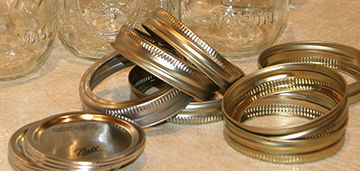
Prepare Product, Pack, and Apply Lids. Prepare and pack the jars per recipe instructions using either a hot pack (food has simmered and is hot) or a raw pack (food is raw or uncooked). Leave the recommended amount of headspace (distance between the food and the top of the jar). Remove air bubbles by running a non-metallic utensil around the inside of the jar. Wipe the rim of the jars with a damp paper towel. Place new, clean, flat lids and bands on the jar; tighten bands until resistance is felt (finger tight). DO NOT OVER TIGHTEN BANDS.
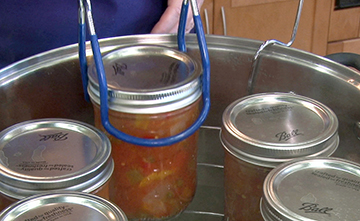
Fill the Canner. Use a jar lifter to place the filled and lidded jars into the canner rack keeping the jars upright; lower the rack into the hot water. If the canner does not have a rack, place a trivet or burner diffuser in the bottom to keep the jars off the bottom of the pot to prevent breakage; carefully lift jars into the hot water making sure they do not touch. Add more water, if needed, to make sure there is 1-2 inches of water above the top of the jars.
Process. Place the lid on the canner and turn the burner on high to bring the water to a full boil. Begin the processing time (including adjustment for elevation) at a full boil. Maintain a full boil throughout the processing time adjusting the burner temperature as needed. If the processing time is long, add boiling water as needed to keep water sufficiently atop the jars.
Rest and Remove the Jars. When the time is up, turn off the burner, remove the lid, and wait 5 minutes. Carefully lift the rack out of the water; let the jars rest in the rack for a few minutes before removing them from the rack with the jar lifter. If a rack was not used, let the jars sit in the hot water for 6-10 minutes before removing them. The rest time will reduce siphoning or loss of liquid. Do not tip the hot jars when removing them from the canner.
Cool. Place the jars upright on solid cooling racks or heavy towels with space between the jars to allow for air circulation. The cooling space should be free of drafts. As the jars are removed or as they sit quietly, enjoy the sound of success—PING!—the sound of the flat lids pulling down and sealing as the jars cool. Resist the temptation to adjust the bands or touch the flat lids. Let the product sit undisturbed for 12-24 hours; check seals, clean jars, remove bands, label, date, and store in a cool, dark location.
Water bath canning is an efficient and safe process for canning high-acid foods. Check out the Boiling Water Canning Method from the University of Minnesota Extension on YouTube (youtu.be/OHT0N0mXUD8) for a review. More information on water bath canning is also available from the National Center for Home Food Preservation: nchfp.uga.edu
Five Home Canning Myths Busted: Use Safe Canning Sources
 MYTH! Grandma’s canning recipes are safe.
While nostalgic, family recipes should not be used for home canning unless those recipes are from research-based canning Safe Sources, including:
- The National Center for Home Food Preservation
- USDA’s Complete Guide to Home Canning
- Cooperative Extension Service
- Ball Home Preserving- MYTH! A sealed jar is a safe jar.
A sealed jar doesn’t guarantee safety. For canned foods to be safe, they must follow Safe Source tested recipes and be properly sealed. - MYTH! Tomatoes are high-acid and safe to be water-bath canned.
Tomato acidity can vary. Tomatoes require acidification to safely can in a water bath or pressure canner. Use Safe Source procedures for lemon juice or citric acid amounts needed. - MYTH! Any food can be canned at home.
Not all foods can be safely canned at home. Commercial equipment reaches higher temperatures than home equipment. For example, there are no Safe Source recipes for canning pureed pumpkin/squash, pumpkin pie filling, pumpkin butter, or soups containing noodles/dumplings. - MYTH! Oven canning is safe and convenient.
Avoid oven canning. There are no Safe Source procedures as it does not provide adequate heat to the center of the jars.
Prioritize Safe Sources of recipes and information for successful and safe home canning.