Intensively managed grazing systems can be a win-win situation, increasing productivity and profits for the operator and improving water quality for the citizens of Missouri. Like all production enterprises, livestock grazing has the potential to produce waste materials that can pollute water. The exact effect grazing lands have on water quality is not well documented. However, the Missouri Clean Water Law, in simple terms, states that "it is a violation to allow the discharge of a pollutant or contaminant to waters of the state" without a discharge permit. The Clean Water Law applies to all production enterprises regardless of size. Therefore, beef producers are urged to maintain vegetation on pastures, especially next to streams and bodies of water.
Agricultural producers are working to reduce the potential for movement of sediment, plant nutrients, pesticides and animal manure into Missouri's surface water and groundwater. Two overall goals of grazing systems management address these concerns:
- Optimizing plant growth will provide vegetative cover that intercepts raindrops, provides plant densities that impede runoff, and ensures a root mass that binds soil particles together on the soil surface.
- Reducing the potential for surface movement offsite, or leaching, of nutrients, animal wastes, and pesticides.
Managed grazing systems can help to distribute manure more uniformly over the grazing area and improve the quality of runoff. Proper grazing management can dramatically improve downstream water quality. Improved on-site water quality can also benefit the livestock production enterprise. Microorganisms and chemicals such as nitrate in the water supply can cause disease or weaken an animal's immune system. This can adversely affect weight gains, reproduction, and milk production. Ponds with high nutrient concentrations also may contain high populations of algae, which may be toxic to animals drinking the water.
To promote proper grazing management, intensively managed grazing systems may be cost-shared by funds from the Missouri sales tax for soil conservation and parks as a water quality enhancement practice.
Types of pasture systems
There are basically three types of pasture systems:
- Continuous grazing
- Rotational grazing (moving one herd between two to seven pastures
- Management-intensive grazing (moving a herd between eight or more pastures).
Each grazing system has advantages and disadvantages (Figure 1).
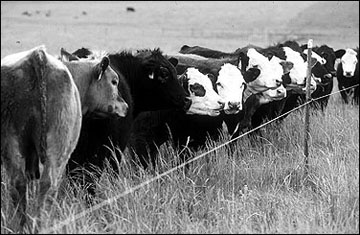
Figure 1
Management-intensive grazing allows sufficient leaf area to remain in a grazed paddock for rapid plant recovery during the following rest period.
Continuous grazing
The advantages of a continuous grazing system include lower setup costs (water and fence) and less required management. Animals can also eat their choice of plants, if the pasture is not overstocked. However, less beef is produced per acre, and animals use only 30 to 35 percent of the available grass, less desirable plants begin to dominate, and it is difficult to maintain legumes and reestablish weakened areas with this system. This system usually results in poor manure distribution.
Rotational grazing (two to seven pastures)
The advantages of a rotational system include the following: the producer can match grazing to plant growth, the desirable plants have a period of rest and regrowth, there is an increase in both forage and animal production, and fields can be set aside for haying and fall stockpiling. The disadvantages are increased costs for fencing and water supplies, more required management and labor, and difficulty in maintaining legumes and reestablishing weakened areas. Manure distribution may still be concentrated and not evenly distributed.
Management-intensive grazing (eight or more pastures)
This system, also called time-controlled grazing management, "cell" grazing or short-duration grazing, has the advantages of increasing forage production and use, and promoting forage diversity. The grazing manager has better control of the grazing animal and also the forage resource. This method of grazing optimizes the amount of beef produced per acre, has fewer weeds and better nutrient cycling, and makes better use of available forage (up to 70 percent). The disadvantages include even higher initial costs for fencing and water and a higher level of management and labor required.
Management-intensive grazing
The goal of management-intensive grazing (MiG) systems is to use the best part of all plants, not just the most palatable plants. Relatively long rest periods follow short grazing periods. Grazing periods and move dates are based on degree of utilization rather than a preset number of days. Both plants and animals can benefit if the system is carefully designed, implemented and managed.
Layout and design
Cattle in paddocks should have ready access to water, preferably within 700 to 900 feet of the water source. Try to have water in the paddocks instead of having alleys to the water (typically, 15 to 20 percent of the manure will be dropped in the alleys and cows will drink 15 percent more water if the water is in the paddock). Paddocks should be laid out as near to square as possible following landscape changes such that each paddock has as little soil variation as possible. Square paddocks require the minimum amount of fencing to enclosed a given area and reduce the distance to water. Rectangular paddocks should not be more than four times as long as they are wide. Permanent paddocks should be sized to meet the average forage allotment expected to be needed and seasonal adjustments made by changing the length of the grazing period or further subdividing the primary paddocks with temporary fencing.
Aerial photos (available from your local office of the Natural Resources Conservation Service or FSA) are useful for making trial layouts of paddocks and estimating amounts of fencing required. Having the photos enlarged may expedite the layout. A soil survey map can be useful in dividing areas with similar productive capability. On terraced fields, locate fences at the terrace's crest if possible and other natural water divides. Avoid running fences downslope across terraces. Wherever possible, plan for straight fences; they are cheaper and easier to build.
Ideally, a lane should connect livestock buildings with every field that may eventually be pastured. A permanent pasture located between other fields can be considered a lane itself. Locate lanes in the driest areas possible, such as along a terrace or natural ridge, otherwise gullies may develop from repeated use. If a well-drained location is impossible, plan on movable lane fences that can be relocated after a year or two. Wherever possible, locate gates and passageways for livestock and equipment in the corner of each field closest to farm buildings. For fields on opposite sides of a road or highway, locate gates opposite each other so livestock can go directly from one field to the other.
Number of paddocks
The optimum number of paddocks will vary with both forage species and animal type, depending on utilization and performance goals, resistance to grazing, regrowth habit, and economic potential. The ideal system would have the animals move to a fresh paddock daily. The advantages of such a system include minimal waste of feed, consistent forage quality each day, reduction of parasite infestations, and rapid, uniform grazing. To begin to realize these advantages, grazing periods should be less than four days. To achieve a 3- to 4-day grazing period, a system should have a minimum of 8 to 12 pastures to allow an appropriate rest period. Most producers quickly see the advantage of more paddocks and move in that direction.
Typically, the CHO (carbon-hydrogen-oxygen) replenishment cycle in forages takes 20 to 40 days. Under good growing conditions, a 20-day rest period may be plenty, whereas in midsummer a cool-season forage may require a rest of at least 40 days. Therefore, fewer paddocks are needed at certain times of the year or the grazing period can be shortened. Paddocks not needed for grazing can be harvested for hay or silage, or a higher stocking rate can be used during the flush of growth in spring and early summer.
Paddock size
Paddocks should be sized to provide a similar number of days of grazing capacity. The cell size needed for a particular herd will depend on the forage available per acre. Subdivide slopes from bottomland and from summits (hilltops). Attempt to follow contour lines with field boundary fences. In a paddock, try to have similar soil drainage, plant community, slope and aspect. Southwest slopes tend to warm up earlier in the spring. Northeast slopes tend to have higher soil moisture and cooler soil in the summer. Given a choice, cows may lie on northeast slopes in summer and concentrate manure. Plantings may vary with landscape location. For example, the bottomland may be seeded to ladino clover and reed canary grass, the eroded slopes to birdsfoot trefoil and tall fescue, and the more productive summits to orchard grass and alfalfa. If all soils do not have similar productive capacity (this is usual), paddock size must vary to achieve the same grazing capacity in each paddock.
Cell size can be estimated by the following equation:
Cell size (acres) = (DI x number. of animals x days in cell) / (yield [pounds per acre] x utilization rate [decimal])
Where
DI = daily intake (pounds per animal-day)
Grazing system calculations
Pounds of dry matter per acre per rest period
The table below shows the average dry matter yield per rest period for cool-season grass production during a seven-month period from April 1 to Nov. 1 based on the estimated total annual hay yield. Rest periods are based on 30 days. This is an average, knowing that the spring rest period will be closer to 20 days and the fall period will be closer to 40 days. To design a system for both warm-season grass and cool-season grass, design each as a separate system, then put them together. An example would be to use warm-season grass to extend the rest period on cool-season grass to 40 days. The warm season grass, in effect, would be the backup for the cool-season grass.
Cool-season grass production
| Hay yield (tons per acre per year) |
5.0 | 4.5 | 4.0 | 3.5 | 3.0 | 2.5 | 2.0 |
|---|---|---|---|---|---|---|---|
| Yield per rest period (pounds dm per acre) |
1,430 | 1,285 | 1,145 | 1,000 | 855 | 710 | 570 |
The table below shows the average dry matter yield per rest period for warm-season grass production during a five-month period from April 15 to Sept. 15 based on the estimated total annual hay yield. Rest periods are based on 30 days.
Warm-season grass production
| Hay yield (tons per acre per year) |
5.0 | 4.5 | 4.0 | 3.5 | 3.0 | 2.5 | 2.0 |
|---|---|---|---|---|---|---|---|
| Yield per rest period (pounds dm per acre) |
2,000 | 1,800 | 1,600 | 1,400 | 1,200 | 1,000 | 800 |
These yields are estimates and are to be used for preliminary design. If yield, rest period or growth period do not agree with the actual situation, a calculation may be done. To calculate forage available per rest period:
- Hay yield (pounds per acre) / Growth period (months) = Average forage available per month
- Rest period (days) / 30 days = Percent of month that is rest period
- Forage available per month (#1) x Percent of month (#2) = Forage available per rest period (pounds dry matter per acre)
Acres per paddock and stocking rate for your herd
To plan a grazing system, you must estimate how much forage your animals will consume.
For the example calculation, we will assume 100 acres of pasture are available to be used by cow/calf pairs with an average weight of 1,250 pounds per pair.
Step 1
Determine your animal units to calculate how much dry matter per animal per day you need. Rule of thumb: Grazing animals consume 3 pounds of dry matter per 100 pounds of body weight each day. [1 AU (animal unit) = 1,000 pounds live weight (consumes 30 pounds DM per day)]
Example
(20 cow/calf pairs x 1,250 pounds per pair) / 1,000 pounds per AU = 25 AU
Your farm
(Number of animals ___ x Weight per animal ___) / 1,000 pounds per AU = ____AU
Example
25 AU x 30 pounds DM per day-AU = 750 pounds DM per day
Your farm:____ AU x 30 pounds DM per day-AU = _____ pounds DM per day
Step 2
Determine how many acres you have in pasture, and calculate its productivity. Use hay yields to estimate forage availability per grazing rotation after 20 days' rest in the spring and 40 days' rest in the summer and fall for cool-season grasses. From the table above for cool-season grasses, use a yield of 2.5 tons per acre per year to arrive at a yield per rest period of 710 pounds DM per acre.
For your farm
Hay yield of ___ tons per acre per year for ______-season grass to arrive at a yield per rest period of ____ pounds DM per acre
Step 3
Decide how often you want to rotate the livestock. For maximum dairy or stocker production, graze one-half to one day. Beef cow herds should graze less than five days; your goal might be three days or less.
Step 4
Calculate the number of paddocks, paddock size, and stocking rate, based on the results from steps 1, 2 and 3. (Example follows)
Assume 3 grazing days per rotation for the example.
For your farm
Grazing period = ____ days per rotation (for first trial)
Example
- 710 pounds DM yield per acre-rest period x 100 acres = 71,000 Total pounds DM available per rest period
Your farm
____ pounds DM yield per acre-rest period x ____ acres = ____ Total pounds DM available per rest period. - Grazing days per rotation = 3 days
Your farm
Grazing days per rotation = ___ days - Number of paddocks = (30 days rest per rotation / 3 grazing days per rotation) + 1
= 11
Your farm
Number of paddocks = (___ days rest per rotation / ___ grazing days per rotation) + 1
= ___ paddocks - (Total DM available 71,000 pounds per 11 paddocks) = (pounds DM / paddock available per rest period)
= 6,455 pounds DM per paddock available per rest period
Your farm
(Total DM available ___ pounds / ____ paddocks) = (pounds DM / paddock available per rest period) - 6,455 pounds DM per paddock / 3 grazing days per rotation = 2,152 pounds DM available per day
Your farm
___pounds DM per paddock / ___Grazing days per rotation = ___ pounds DM available per day - 2,152 pounds DM available per day / 30 pounds DM per day-AU = 71.7 Stocking rate in animal units
Stocking with 1,250 pounds cow/calf pairs = 1.25 AU per pair, the 100 acres of pasture can carry 71.7/1.25 = 57 cow/calf pairs
Your farm
___ pounds DM available per day / 30 pounds DM per Day-AU = ___ Stocking rate in animal units - 100 Total acres / 11 paddocks= 9.1 acres per paddock
Your farm
Total acres / paddocks = acres per paddock
Fencing
An appropriate design and type of fencing are required to control grazing and make efficient use of forage. In any pasture, livestock will graze the most palatable plants first, but without adequate control, will leave less palatable plants until later in the season or ignore them altogether. Managed grazing systems may be a fixed system with permanent fences and waterers or a flexible system with portable fences and waterers. Both portable and fixed systems generally have farm boundary fences with woven or barbed wire, or electrified, high-tensile smooth wire to ensure that all livestock is restrained on the farm and excluded from any cropland.
Fixed fencing systems
A typical fixed system may have interior divider fences and lane fences with one or more 12-1/2 gauge, high-tensile electrified wires for cattle, depending on the range of sizes of animals to be restrained. Two "hot" wires will usually suffice for restraining all sizes of cattle in lanes and paddocks (but not in lots or corrals). Small calves may not have to be confined to a certain paddock and be allowed to "graze ahead" where the cows are restrained by one hot wire. On shallow, rocky soils, a two-wire fence with one charged and one grounded may be required for consistent stock control.
Advantages of the fixed system: minimum daily labor, low maintenance, and low cost per acre on large installations. Disadvantages: high cost per acre on small installations, and limited management flexibility.
Often, large areas with fixed fences will be subdivided into paddocks with portable fences that can be moved ahead daily, or less often, as the schedule dictates. Having a fixed, electrified fence along one or both ends of the area will provide the charge for the portable fence.
Flexible (portable) fencing systems
A typical portable fence system may use electrified tape or polywire on a reel for the interior divider fences supported on lightweight, step-in plastic posts. Tape shows up better to both cattle and deer but may have a shorter life than polywire since it flutters in the wind.
Advantages of the portable system: high management flexibility, low cost per acre on small installations.
Disadvantages: more labor, high maintenance.
Electric fences
Electric fences are the key to low-cost and effective fencing for managed grazing and other fencing applications:
- Managing pasture and rotational grazing
- Constructing temporary lanes
- Protecting haystacks or other feed supplies
- Extending the life of old line fences
- Stopping animals from crowding fences
- Adding safety to bull pen or pasture fences
- Lowering the cost of feed lot fences
- Salvaging of grain (and stover) left in the field
Electric fence energizers
In recent years there has been a proliferation of fence energizers (also called controllers or chargers) with increased capability, sophistication and cost. The better controllers can deliver a shock even under unfavorable conditions such as dry ground and with weeds or grass contacting the fence wire. Fence chargers are typically powered by 6- or 12-volt batteries, by solar power, or by mains (120 or 240 volt AC power). Heavy-duty batteries that are designed to withstand a deep discharge before recharging are recommended. Use the mains type of charger if power is available. These models have more capability to deliver the voltage and intensity of shock required under unfavorable conditions in addition to saving the cost of batteries and the inconvenience of checking on and changing batteries. Locate a mains-type charger where it will stay dry, be easily accessible for inspection and protected from livestock and small children. Do not use "homemade" chargers; they may, and often do, kill people and animals. Select a charger that is approved by Underwriters Laboratories (UL), or the U.S. Bureau of Standards.
Solar-powered chargers are battery units with a solar panel to keep the battery charged (Figure 2). The larger battery units may discharge a deep cycle battery in a week. It will take about 7 to 10 watts of solar panel per joule output, depending on the amount of sunlight and panel orientation. A 10-watt solar panel may cost $100 to $300.
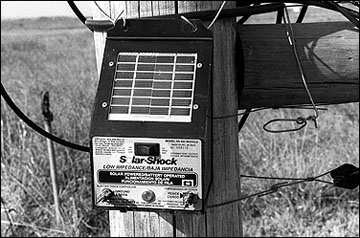
Figure 2
Solar-powered fence energizers use a solar panel to charge a battery.
Desirable features of chargers include the following:
- An indicator to show sufficient input voltage.
- An indicator to show correct charger operation.
- A solar panel to charge a battery-type fence energizer.
- A light or dial indicator to show when the fence is sufficiently charged.
- A high-low switch or separate output terminals for dry or normal conditions.
- A method of mounting a charger so that it can be moved and mounted easily.
- A weather-tight case for chargers that will be used in remote locations.
- A half-power option for battery-powered units.
Electrical output
Check with the manufacturer to select a controller with output characteristics matched to the length of fence to be energized and the expected operating conditions (including dry soil and shorting from weeds and grass). Older-style units (now known as high-impedance energizers) typically have an "on" time of 0.1 second or less, 45 to 60 times per minute, output voltages may be as high as 30,000 volts with currents in the 25 milliampere range. High impedance energizers are satisfactory for clean fences, but if shorted with green growth, the fence is essentially "dead."
A low-impedance energizer, sometimes called a New Zealand-type energizer, may operate at a lower voltage (2,000 to 3,000 volts and up to 6,000 volts on more powerful units) but can deliver a higher amperage (up to 30 to 40 amperes). This characteristic can result in a charged wire past the location of a partial short, such as from green vegetation touching the wire. The line is typically pulsed (energized) approximately every second for about 0.0003 second. The short pulse will not cause grass (or weed) fires. The pulse rate is adjustable on some battery-powered energizers (e.g., 65 pulses per minute (ppm) for fences frequented by deer or for training animals to 45 ppm for trained animals) to conserve the battery.
The required voltage to deliver a shock depends on such factors as ground moisture, wire size, total length of wire, amount of vegetation contacting the wire, and length of hair on the animals being fenced. The "guard voltage" is the voltage present at any point on the fence where an animal may contact it. A minimum guard voltage of 2,000 usually suffices for cattle. Up to 4,000 volts on all portions of the fence may be required for extremely dry conditions or for well-insulated animals such as sheep. Line voltage to ground should be checked with an appropriate voltmeter.
Charger ratings
Some chargers are rated in miles of fence or in acres. A better rating is in miles of wire under stated conditions, such as resistance to ground. Many chargers are now rated in volts and amperes of output under various resistances (e.g., 100, 500, 5,000 and 50,000 ohms). A common rating is in joules, an energy unit that is a function of voltage, amperage and pulse time (the water analogy would be pressure, flow rate and time). However, a high joule rating may result from a long pulse time rather that a high voltage or amperage rating. One joule is equal to one watt for one second in the British system. As a rough rule of thumb, allow one mile of fence per joule rating of the charger, depending on the quality of the insulators and the grass/weed load on the wires (e.g., a 6 joule charger would energize 6 miles of fence). Manufacturers usually claim up to 6 miles of fence per joule under ideal conditions. Costs for chargers range from as low as $100 for a typical 1 joule battery-powered charger to $750 for a 240 volt input, 28 joule output charger. Buy a charger with excess capacity to allow for future expansion or buy one or more additional chargers and divide the fence into zones, but do not connect two chargers to one zone.
Grounding
Most electric fences depend on the ground to carry the current that passes through the animal back to the charger and should have very low resistance to ground, preferably as low as 10 to 25 ohms. Some fences, especially for extremely dry soil conditions, may have alternate wires grounded so that an animal will touch both a hot wire and a grounded wire. The grounded wire(s) will be direct connected to the ground terminal on the charger and should also be grounded with rods to divert lightning from the charger. Follow the operator's manual for grounding the energizer. A rule of thumb is to have 3 feet of ground rod per joule of energizer output. Ground rods may be 1/2 inch or larger diameter rods (copper, copper-bonded, or galvanized steel), or 3/4 inch or larger galvanized pipe, and usually 6 or 8 feet long.
Typically, for the larger energizers, three or four ground rods spaced 10 feet or more apart are connected to each other and to the ground terminal on the energizer with a continuous wire of 12-1/2 gauge or larger. The ground rod wire and clamps should be of a material that will not cause corrosion. If possible, locate the ground rods in an area with moist earth, such as on the north side of a building near the drip line of a roof. Do not ground to the service entrance ground. The ground rods should be at least 30 feet from other grounds and from underground metal pipes. In rocky soils, ground rods may have to be laid in a trench. It is critical that these rods be located in a moist area or kept moist.
Lightning and surge protection
High-line (mains-type) energizers should be plugged into a surge protector. On the output side, an induction coil, typically consisting of 8 to 10 turns of heavily insulated wire taped together in a coil 10 to 12 inches in diameter located at least 20 feet from the energizer, will serve as a lightning brake (choke). A lightning diverter (arrester) located where the lead-out wire joins the fence and other diverters at the far end of the fence and at high spots along the fence, will divert lightning charges to ground. The diverters should each be as well grounded as the charger. For further protection, a switch between the diverter and the choke can be opened when a storm approaches (it usually takes a while for livestock to discover an electric fence is turned off).
Wire
High-tensile wire
Twelve and one-half gauge smooth high-tensile wire (typically rated at 180,000 to 200,000 psi strength) is commonly used for the permanent portion of electric fences. The galvanized coating is usually Class 3, which is three times as thick as the Class 1 coating on ordinary barbwire. High-tensile wire can be easily unrolled by using a reel called a "spinning jenny." This wire may be spliced by using a figure eight knot but easier and better by using two crimped sleeves.
Wire spacing
The number and spacing of wires in an electric fence depend on the kind of animals to be constrained. Table 1 shows typical configurations for cattle fencing.
Table 1
Wire spacing guide (A 1-wire fence is usually located about 2/3 animal shoulder height.)
| Animals to be constrained | Number of wires in the fence | Wire spacing above the ground |
|---|---|---|
| Cows | 1 | 26 to 32 inches |
| Cows and calves | 2 | 18 to 24, 24 to 36 inches |
| Hard-to-hold cattle | 3 | 11 to 18, 23 to 30*, 34 to 44 inches |
* This wire could be grounded for very dry conditions or for sandy or gravelly soils (which have low conductivity) so animals will touch a hot wire and a grounded wire.
Wire tighteners (strainers)
Each high-tensile fence wire should have an in-line tightener in each 1/4 mile of straight run to adjust tension. Each strainer consists of a reel to take up the excess length and a locking mechanism. Some form of a lever must be used to rotate the reel. In short stretches and around lots and other "pressure regions," a tension spring may be needed (Figure 3).
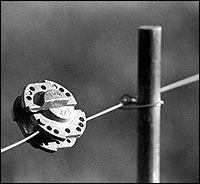
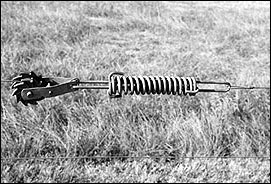
Figure 3
In-line tighteners for high-tensile wire fences. They include a locking mechanism, right, and a tension spring, left.
Polywire and polytape
For short-term grazing (strip grazing), polywire and polytape are lightweight and easily moved and hand stretched. Polywire looks like colorful polyethylene binder twine laced with several strands (usually 3, 6 or 9 strands) of wire to carry the electrical current. Polywire with 6 or 9 strands of stainless steel wire is most common and can be used for longer runs without excessive voltage drop. Due to the high resistance of these conductors, they are usually used for short runs of less than 2,000 feet. Polywire is easily spliced by tying a knot. Knots in polytape may not make good wire contact. Commercial splice buckles are available, or a 7/16-inch lock washer may be used as a connector.
The polytape shows up better to animals than the polywire (Figure 4). Both types of conductors are usually handled on reels that can be easily carried in one hand while being reeled in or out.
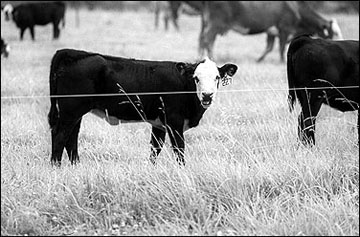
Figure 4
Animals can more easily see polytape than polywire in an electric fence.
Reels
The reels are usually locked and hung on a high-tensile boundary wire until the next move. Capacities vary from 300 feet to 1,320 feet of polytape and from 660 feet to 2,640 feet of polywire. To minimize the electrical resistance and the reel weight, the length of the conductor on the reel should be not be greatly longer than necessary. Two types of locking systems are used, the cog and lever system (positive) and the friction washer type (non-positive). A geared-up reel that has a 3:1 ratio can save time when rewinding of the tape or wire (Figure 5).
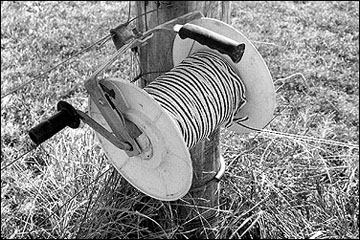
Figure 5
Geared reels for polytape or polywire allow easy installation of temporary electric fences in paddocks.
Posts
A variety of plastic posts are available. Small plastic step-in posts with several molded-on wire/tape clips are commonly used for strip grazing, the highest clip being about 3 feet above the ground (Figure 6, left).
New and used fiberglass sucker rods in a variety of sizes from 3/8 inches, 1/2 inches, 5/8 inches and larger are used for posts without insulators. Wire spring clips are used to attach the tape or wire to the small posts (Figure 6, right); holes are drilled in the larger posts to support the wires.
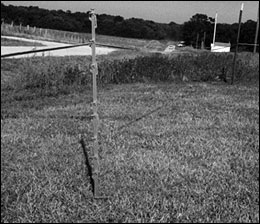
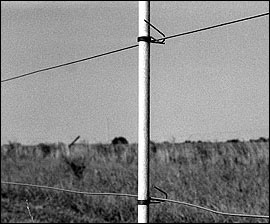
Figure 6
These posts do not require insulators. Left, plastic fence post with molded-on wire/tape clips. Right, fiberglass rod with wire clips.
Common wood posts and steel posts are used with insulators for more permanent electric fences. Certain types of imported wood posts are used without insulators. Well-seasoned hedge (osage orange) posts may be used without insulators if prolonged wet conditions do not seriously reduce the guard voltage. Line posts on level or uniformly sloping ground can be spaced up to 100 feet apart. Spacings of 40 to 60 feet are more common on rolling Missouri land. For corners and ends of high-tensile fences, 8-foot wood posts with tops at least 5 to 6 inches in diameter should be set 4 feet into the ground and provided with adequate H-bracing. Floating braces are excellent for multiwire fences and are lower-cost and easier to construct than H-braces, especially in rocky soils.
Insulators
For permanent electric fencing, select only UV stabilized high-density polyethylene or polypropylene insulators for use on steel posts or conventional wood posts (ones that will seldom be knocked off by deer). Steel posts should be kept to a minimum to avoid potential shorts when insulators break or deteriorate. High-quality insulators for corners and ends are especially critical (Figure 7).
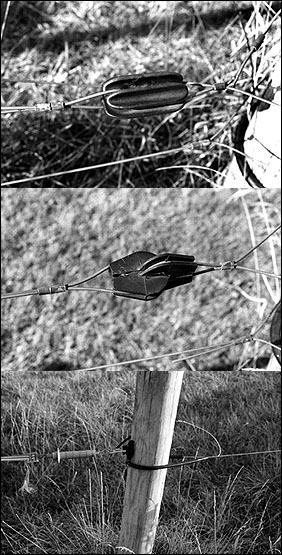
Figure 7
Three types of insulators for corners and ends of high-tensile wire fences. (Top) Ceramic. (Middle) Polyethylene or polypropylene. (Bottom) Wrap-around tube-type insulator.
These can be the wrap-around tube-type insulators or double-U or double-hole terminal insulators. Porcelain insulators will work if they are of good quality. Many "farm store" insulators may crack under the strain from high-tensile wire. Moisture in the crack may cause a short if the tie-off wire contacts a grounded wire. When using the double-hole insulators, be sure the two wires cross over one another to load the insulator in compression. If the insulator is loaded in tension, it can be pulled in half.
Gates
The electrical charge can be passed by an open electrified gate by going overhead high enough to clear animals and equipment or by burying the wire underground. Twenty thousand volt insulation on direct-burial wire is available from fencer supply companies. Placing buried wire inside plastic pipe decreases the risk of short-circuiting. Gates should be constructed to be non-electrified when open. Various types of "patented" gates are available for driving through or over with a vehicle.
Electrified floodgates can be made by attaching droppers to the electrified wire at a spacing of 6 inches above average normal water level. Floodgate controllers are available to limit current flow when the gate is flooded.
Training animals
Electric fences are more of a psychological barrier than a physical barrier, and animals need to be trained to respect them. Animals should be trained with a hot wire inside a permanent fence or corral so they cannot escape if they charge past the wire. It helps to have an open gate to teach them certain areas are safe, since they will be moving through gates in managed grazing systems.
For further information
- American Society of Agricultural Engineers. 1994. Test Procedure for Measuring the Output Characteristics of an Electric Fence Controller, ASAE S500. ASAE, St. Joseph, Mich.
- American Society of Agricultural Engineers, 1997. Installation of Electric Fence Controllers, ASAE EP568. ASAE, St. Joseph, Mich.
- Cooperative Extension Service, University of Arkansas, 1994. Electric Fencing Materials and Equipment. University of Arkansas, Little Rock.
- Pasture Management Guide for Livestock Producers, Pm-1713. 1998. Iowa State Extension Distribution Center, Ames.
- Top of the Ozarks RC&D. 1994. Pasture Management Guide for the Ozarks. Top of the Ozarks RC&D, Houston, Mo.
- Top of the Ozarks and Southwest Missouri RC&D Councils. 1996. Management Intensive Grazing in the Ozarks. Top of the Ozarks RC&DC, Houston, Mo. Southwest Missouri RC&DC, Republic, Mo.
- USDA-Natural Resources Conservation Service. 1998. Pasture Management Guide for Northern Missouri. USDA-NRCS, Columbia, Mo.